So, there hasn't been too much going on this week.
Last week at TADA, I somehow got volunteered to teach the group how to make working paper clocks. Luckily, I managed to talk my way in to making it a Christmas event, meaning I have until December to figure it out. I have a general idea of how I'm going to do it, but need to fine tune it.
But, on to the more important things! My project that I've been slaving over. I'm nearly finished! And I made sure to take lots of progress pictures!
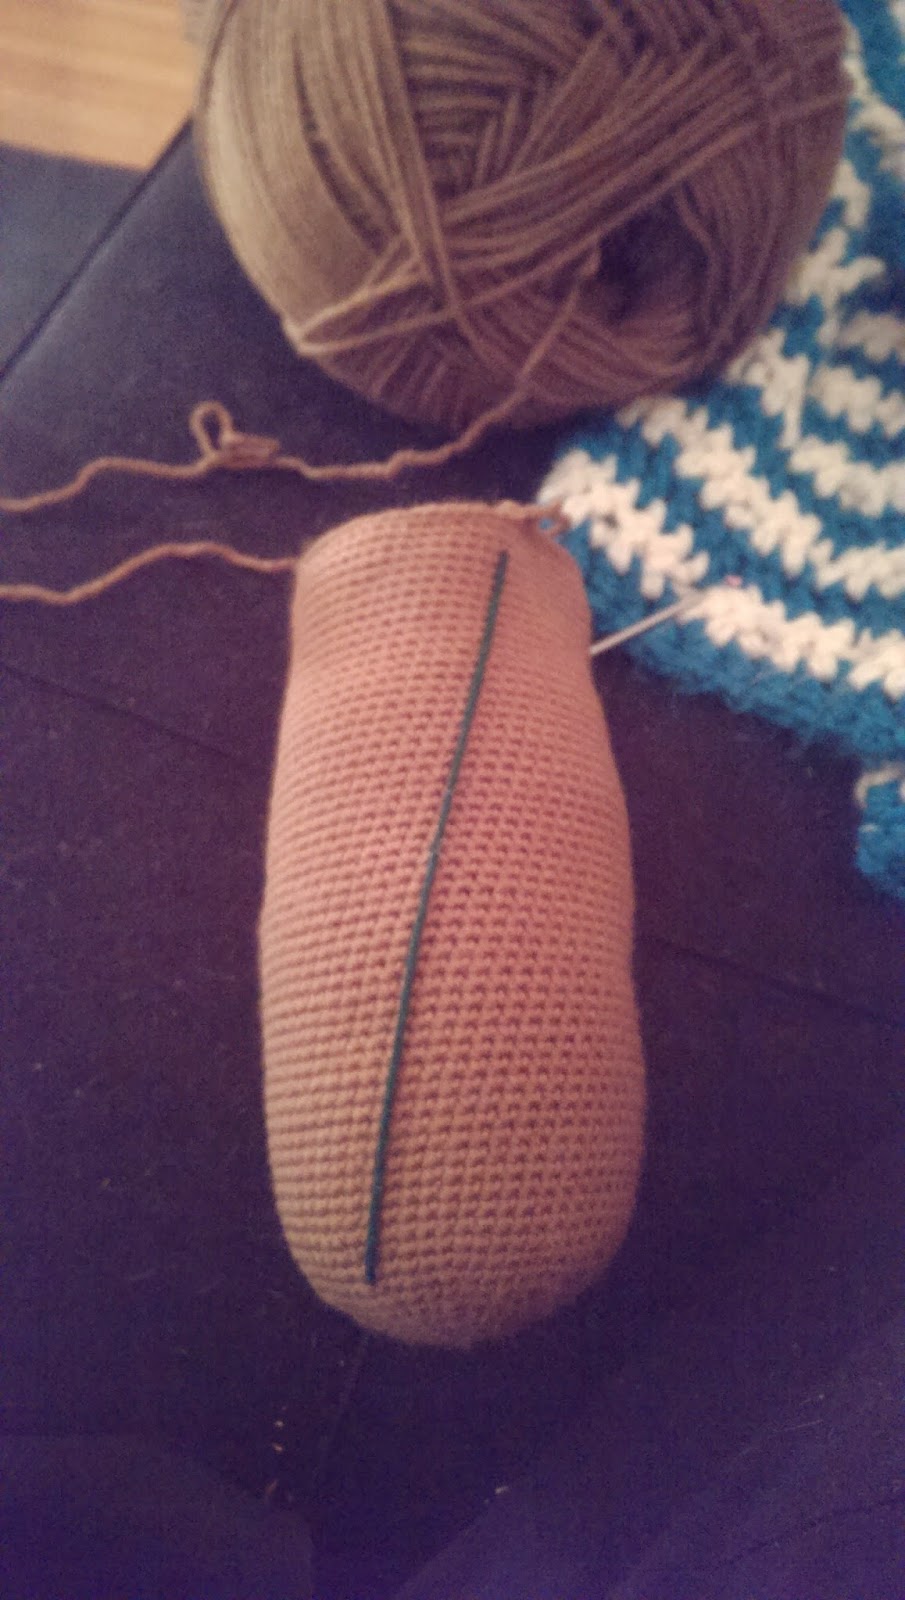
I finally finished this, the body, after so much trial and error - meaning the fail attempt from last weeks post. This little body only took me about five days to do - mostly because my hand was sore from the previous attempt. And from here, it was joyous, I'm most of the way finished!
Then I made this little cuties. No, they're not a single piece. The foot and the leg are two different pieces sewn together. And now, this is where the fun begins!
There is wire in both the legs - my first time using it! Let me tell you, wire makes sewing on the body part sooo much easier. There was next to no effort. <3
I forgot to take pictures of the little circle pieces that go on/above his legs, but they're just a simple, generic circle. Here's a side view of how nice it looks.
I just love how it's turning out so far! Only the upper body left to go!
This is the arm, wire and all! I've been really enjoying working with the wire. I'm sure you wondering about those three tips sticking out. Well, soon you all shall know what I'm working on - if you haven't figured it out already!
These. Are. Annoying. They also hurt my hands - of course, if I stopped for more than a day to rest my hands, they probably wouldn't hurt. I've had to make a few of these. Luckily I got it right the second time I tried making one of these. They go on the three wire pieces coming out of the arm.
Pretty epic, no? I found it was easier to sew the arm to the body first, then attach the green bulbs. Just one arm left to go, and the head piece!
And here is where I'm conflicted. Females have a longer head branch then males. But, I usually prefer my things to be male. I'm thinking, for the sake of my sanity - working with small things is maddening - that I'm going to make this a girl.
I'm hoping to be finished the arm and head piece some time tomorrow. I only have one green bulb left to make, an arm and the head piece. From there, I just have to do the details on the body. Which brings me to my next topic.
I finally invest in this.
Needle felting! I had already tried it out a bit before I thought to take pictures; my excitement got the better of me!
I knew I couldn't try it on my main project, that would just be a silly idea. Then I remember something I made ages ago, but never finished because it was so tiny and I just said screw it. A Kirby!
I don't remember where I got the pattern for it, as it was one of the first things I made when I started crocheting. But, it's tiny, and as no face. Until now!
Well, not really, I got the white of the eyes in, and then while I was trying to do the blue to the eyes, silly me went and broke the needle. D= I had only been working with it for maybe ten minutes before that happened. I'm not surprised, I actually saw it coming, and yet I didn't buy replacement needles when I bought this. -.-
The nice thing, though, is that I had two 40% off one item coupons. So, the needle - which was expensive - was no longer so pricey. And I used the other coupon on one of the roving felt kits. Even more good news, I have another two 40% off coupons! I just can't use them until the 25th - tomorrow. That is when I shall go out and replace my needles. No point today, as I don't need them yet. :)
But, that I all I have to post about for today! I just figured I should because it had been almost a week! I'll be back in a few days with more things to talk about! And hopefully more crafts finished. <3
Showing posts with label wire. Show all posts
Wednesday, 24 September 2014
Sunday, 14 September 2014
Current Projects
After a long week of slaving away on the project for the Woodland Creatures amigurumi challenge, I'm close to done - the body, that is. So, I ended up getting overzealous at the start of this project. I didn't want to make it too small, and in the process, I ended up making it bigger than I intended.
Here, it doesn't look too big, right? Well, I didn't think so either. And as I kept crocheting and crocheting, I realized that I may have been a bit too ambitious. Sure, I wanted to make a bigger than usual amigurumi, but I think I over did it! After days of crocheting - off and on - this is where I'm at!
Just ignore the lumps and odd shape, it's not properly stuffed yet. As you can see, it's quite big. I'm hoping that I'll be finished making the length within the next day or so - I'm hoping I only have a few more rows left. I also decided to do something I little different with my stuffing. I used beige nylon - pantyhouse. I figured, it's a BIG project, and I don't want to risk any mistakes of stuffing showing through, even though I'm using quite a small hook.
I think it's going to be quite the adventure stuffing this in the end, however I have my trusty STUFFING STICK!
It's not really a stuffing stick, I'm just using it as one. In fact, I'm not even sure what it's intended for. It was in a collection of crochet hooks and knitting needles I received from a friend of mine a while back. Hopefully it'll work well in assisting me with stuffing this monster.
On another note, I've acquired wire. Yes, wire. This is going to be a fully poseable project!
The one on the left I purchased at my local craft store, the one on the right, Wal-Mart. The price difference, almost five dollars. But, oh well. Wal-Mart didn't carry as thick of wire. So, it's all good. I'm so excited to finish the body, just to work on the rest of him and make him as poseable as possible!
I've been working so hard on him, this happened.
It's not the first time this has happened to me, however, this was a relatively new hook - luckily I had a spare one! Hopefully it holds out until the end of the project - and many more! - but, if not, I bought another one. :)
And in the meantime, I've been needing to take breaks in between crocheting - a day off here and there. And in that time, I couldn't just sit around and do nothing. So, I figured I would start working on some of those plastic canvas ideas I had a while back - I hadn't forgotten about them! They are awesome.
It starts off looking like this.
Now, I bet you're all wondering, what the heck is that going to be? (It kind of reminds me of something from Harry Potter - Ravenclaw, even though it's blue and black) Before I show the next progress picture, I'm going to share what behind this looks like, because I think it's super cool!
Neato, right? And now, maybe this will answer your question of what the heck I'm making!
Looking familiar? I hope so! I've been keeping to a theme of plastic canvas projects - with the piggy bank, the book ends, and the pencil holder.
TADA!! Pretty sweet, amiright? It's the ! block (panel in this case) from the Mario 64 games! I did one for each colour. If anybody played these games as much as I did, then hopefully you'll remember which each colour did. Blue gave you the Vanishing Cap.
Green gave you the Metal Cap.
Red gave you the Wing Cap.
And yellow gave you coins and other objects!
Now, let me tell you, these aren't small, at all. But, it's the only way I could work the pattern without it looking awkward.
See, pretty big. Now, I'm not sure if I'm going to just leave them as a single panel, or turn them all in to cubes. I'd love to make them into cubes, but, I'm sure we all know how tedious repeating the same project can be. At the very least, I want to make one into a cube - probably the blue one. I guess we'll see how I feel about doing the project over and over again from there - though, I do have enough of the sturdy plastic canvas to complete them all!!
Oh, I should probably share this.
This is the pattern I used to make the question mark, the rest I had to figure out on my own.
Now, on a new note, this Friday was Michele's last day with us at TADA. We had a small gathering for her, said words of praise and all that. Then, somehow, she throws me in to the spotlight on her special day. That lady is crafty, let me tell you.
And now that she's gone - though she will come back periodically for visits and whatnot - the group and associates want me to take over. I told them, as long as someone else is liaison between the clinic and the group, I can try my best to take over for the art courses. Until the baby is born. We'll be meeting this Friday as a group to discuss what we want to do. Michele is willing to stay in contact with the group until we're all back on our feet in terms of plans. I was thinking, as I've been gone for two years, that surely there are activities the group wouldn't mind repeating.
So, I'm going to look in to that, see if I can make a lesson plan that's a couple months of repeats until I get back in the swing of things myself. It's not a bad idea. But, we'll see on Friday.
And now, I leave you all with this.
Here, it doesn't look too big, right? Well, I didn't think so either. And as I kept crocheting and crocheting, I realized that I may have been a bit too ambitious. Sure, I wanted to make a bigger than usual amigurumi, but I think I over did it! After days of crocheting - off and on - this is where I'm at!
Just ignore the lumps and odd shape, it's not properly stuffed yet. As you can see, it's quite big. I'm hoping that I'll be finished making the length within the next day or so - I'm hoping I only have a few more rows left. I also decided to do something I little different with my stuffing. I used beige nylon - pantyhouse. I figured, it's a BIG project, and I don't want to risk any mistakes of stuffing showing through, even though I'm using quite a small hook.
I think it's going to be quite the adventure stuffing this in the end, however I have my trusty STUFFING STICK!
It's not really a stuffing stick, I'm just using it as one. In fact, I'm not even sure what it's intended for. It was in a collection of crochet hooks and knitting needles I received from a friend of mine a while back. Hopefully it'll work well in assisting me with stuffing this monster.
On another note, I've acquired wire. Yes, wire. This is going to be a fully poseable project!
The one on the left I purchased at my local craft store, the one on the right, Wal-Mart. The price difference, almost five dollars. But, oh well. Wal-Mart didn't carry as thick of wire. So, it's all good. I'm so excited to finish the body, just to work on the rest of him and make him as poseable as possible!
I've been working so hard on him, this happened.
It's not the first time this has happened to me, however, this was a relatively new hook - luckily I had a spare one! Hopefully it holds out until the end of the project - and many more! - but, if not, I bought another one. :)
And in the meantime, I've been needing to take breaks in between crocheting - a day off here and there. And in that time, I couldn't just sit around and do nothing. So, I figured I would start working on some of those plastic canvas ideas I had a while back - I hadn't forgotten about them! They are awesome.
It starts off looking like this.
Now, I bet you're all wondering, what the heck is that going to be? (It kind of reminds me of something from Harry Potter - Ravenclaw, even though it's blue and black) Before I show the next progress picture, I'm going to share what behind this looks like, because I think it's super cool!
Neato, right? And now, maybe this will answer your question of what the heck I'm making!
Looking familiar? I hope so! I've been keeping to a theme of plastic canvas projects - with the piggy bank, the book ends, and the pencil holder.
TADA!! Pretty sweet, amiright? It's the ! block (panel in this case) from the Mario 64 games! I did one for each colour. If anybody played these games as much as I did, then hopefully you'll remember which each colour did. Blue gave you the Vanishing Cap.
Green gave you the Metal Cap.
Red gave you the Wing Cap.
And yellow gave you coins and other objects!
Now, let me tell you, these aren't small, at all. But, it's the only way I could work the pattern without it looking awkward.
See, pretty big. Now, I'm not sure if I'm going to just leave them as a single panel, or turn them all in to cubes. I'd love to make them into cubes, but, I'm sure we all know how tedious repeating the same project can be. At the very least, I want to make one into a cube - probably the blue one. I guess we'll see how I feel about doing the project over and over again from there - though, I do have enough of the sturdy plastic canvas to complete them all!!
Oh, I should probably share this.
This is the pattern I used to make the question mark, the rest I had to figure out on my own.
Now, on a new note, this Friday was Michele's last day with us at TADA. We had a small gathering for her, said words of praise and all that. Then, somehow, she throws me in to the spotlight on her special day. That lady is crafty, let me tell you.
And now that she's gone - though she will come back periodically for visits and whatnot - the group and associates want me to take over. I told them, as long as someone else is liaison between the clinic and the group, I can try my best to take over for the art courses. Until the baby is born. We'll be meeting this Friday as a group to discuss what we want to do. Michele is willing to stay in contact with the group until we're all back on our feet in terms of plans. I was thinking, as I've been gone for two years, that surely there are activities the group wouldn't mind repeating.
So, I'm going to look in to that, see if I can make a lesson plan that's a couple months of repeats until I get back in the swing of things myself. It's not a bad idea. But, we'll see on Friday.
And now, I leave you all with this.
Subscribe to:
Posts (Atom)